最近在做一个新的测试平台,使用了最近比较火的开源框架—— gin-vue-admin, 对于一个admin框架来说,这个真的做的挺好的了,支持简单的crud代码自动生成,拖动的方式创建前端页面。另外还拥有jwt鉴权,动态路由,动态菜单,casbin鉴权等功能,对快速搭建一个web平台非常方便。
背景
然而,框架默认是使用账号密码登录的,显然为每个人另外创建一个账号是不合适的,更好的选择是接入我们公司的账号体系,因为我们公司是使用google服务的,所以每个人使用公司邮箱登录(谷歌企业账号)到这个测试平台才是最合适的。所以,这里就需要对框架做一些改造,使之支持谷歌的oauth授权登录,一般情况下,oauth后使用session-cookie的方式进行认证和鉴权,但为了对框架尽量少的改动,需要在oauth授权后转为框架目前的jwt认证鉴权方式。
解决方案
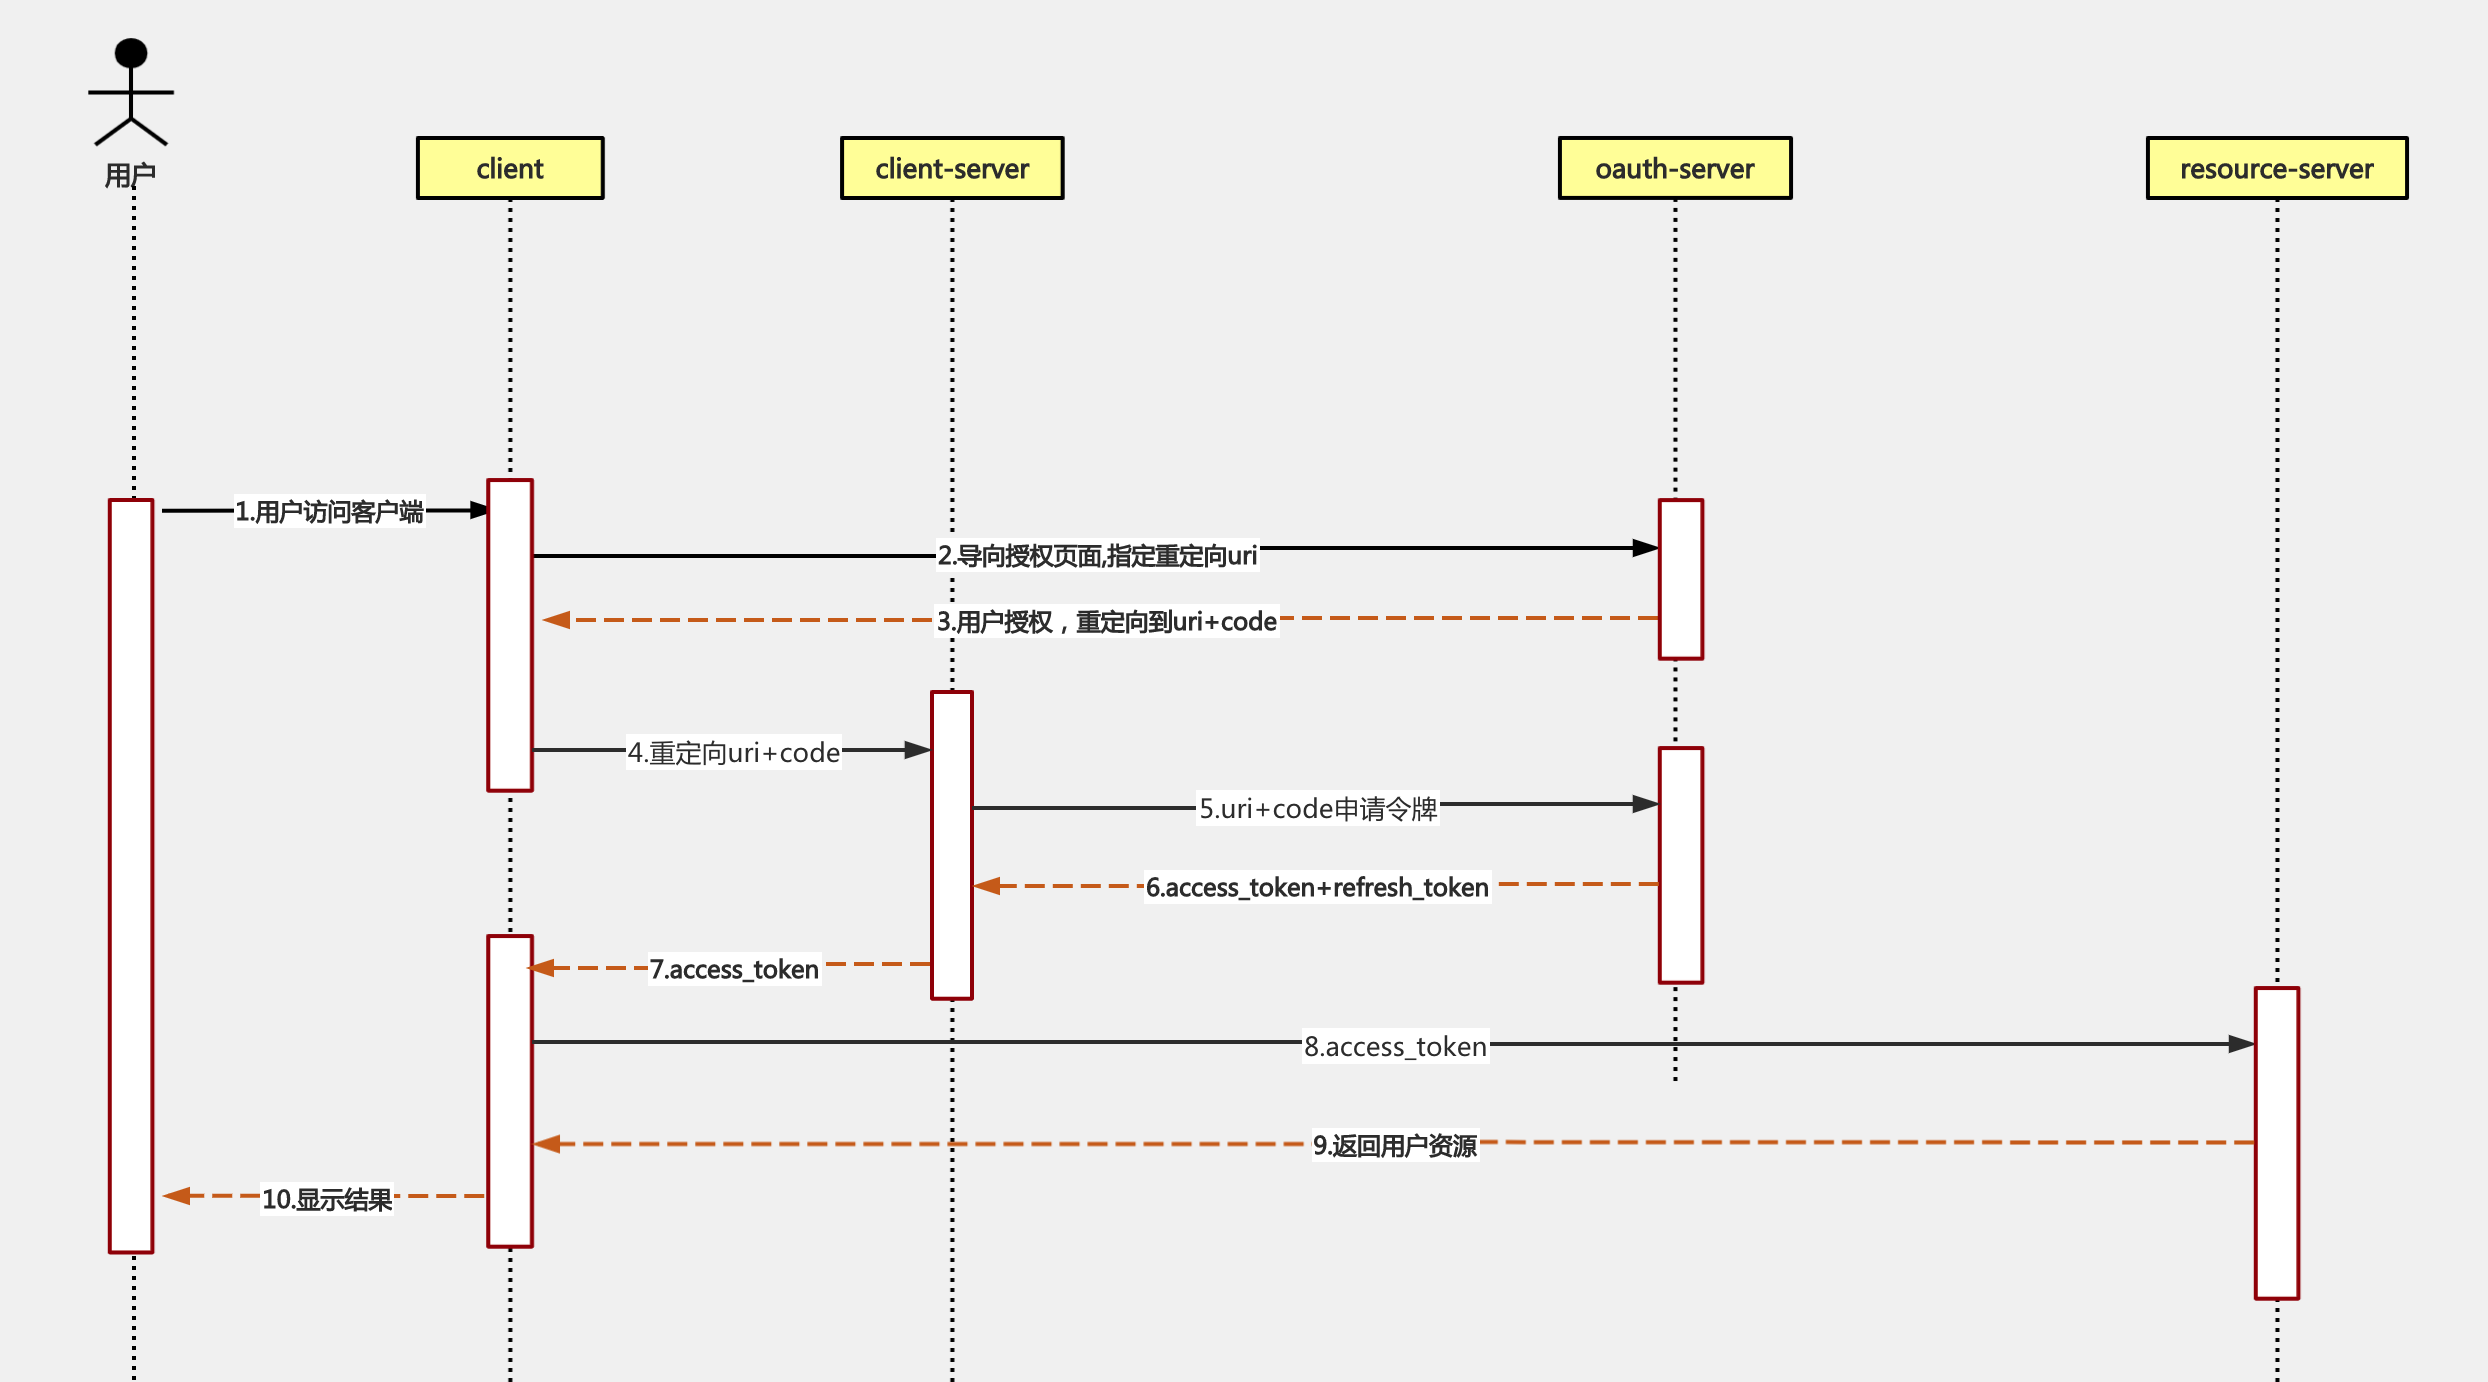
oauth2.0的登录方式如上图所示,对gin-vue-admin的改造内容有:
-
前端实现从google重定向回来后,js向后端发起callback,获取jwt
-
后端需要实现未登录时重定向到google授权页面,另外还有callback接口,获取用户的信息,然后返回jwt给前端。
下面,详细讲解整个实现方案。
后端实现
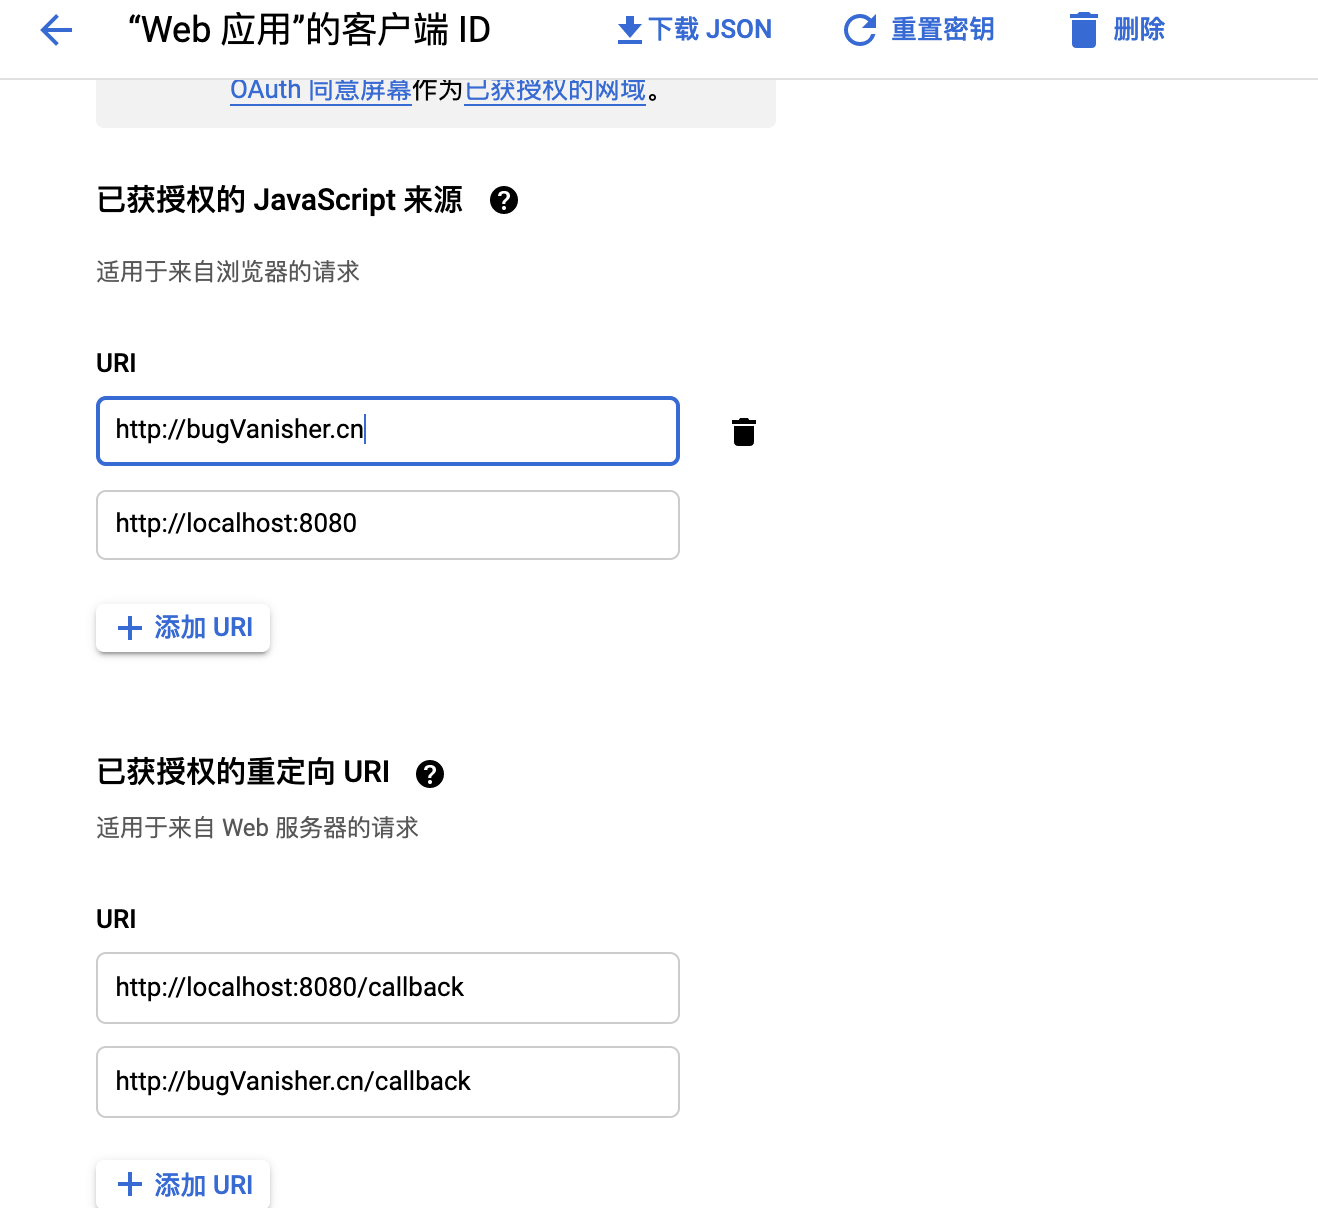
在Google APIs中申请凭据,得到客户端ID和客户端密钥,配置好授权的重定向地址,类似如下:
然后声明和初始化一下,谷歌Oauth config:
var (
  googleOauthConfig = &oauth2.Config{
		ClientID:     "xxxxxxx",
		ClientSecret: "xxxxxxxx",
		Scopes: []string{"https://www.googleapis.com/auth/userinfo.profile",
			"https://www.googleapis.com/auth/userinfo.email",
		},
		Endpoint: endpoint,
	}
)
在路由中添加两个接口,分别是:
BaseRouter.GET("auth", v1.Auth)
BaseRouter.POST("auth/callback", v1.HandleCallBack)
一、auth接口-未登录跳转
auth接口的实现如下:
func Auth(c *gin.Context) {
	googleOauthConfig.RedirectURL = global.GVA_CONFIG.System.BaseDomain + "/callback"
	// 使用oauth库生成授权地址
	url := googleOauthConfig.AuthCodeURL(oauthStateString)
	token := c.Request.Header.Get("x-token")
	// 未登录则返回授权登录地址
	if token == "" || service.IsBlacklist(token) {
		response.FailWithDetailed(response.SUCCESS, url, "unauth", c)
	}
	// 已登录,重定向到首页
	http.Redirect(c.Writer, c.Request, global.GVA_CONFIG.System.BaseDomain, http.StatusTemporaryRedirect)
}
二、callback接口-根据code获取用户信息
为了重用原有的生成jwt逻辑,在收到前端过来的code和state时,后端去获取用户信息,再调用tokenNext,代码如下:
func HandleCallBack(c *gin.Context) {
	var callback request.CallBack
	_ = c.ShouldBindJSON(&callback)
	if callback.State != oauthStateString {
		fmt.Printf("invalid oauth state, expected '%s', got '%s'\n", oauthStateString, callback.State)
		//http.Redirect(c.Writer, c.Request, global.GVA_CONFIG.System.BaseDomain, http.StatusTemporaryRedirect)
		return
	}

	code, _ := url.QueryUnescape(callback.Code)
	token, err := googleOauthConfig.Exchange(oauth2.NoContext, code)
	if err != nil {
		fmt.Println("Code exchange failed with '%s'\n", err)
		return
	}

	userInfoResp, err := http.Get("https://www.googleapis.com/oauth2/v2/userinfo?access_token=" + token.AccessToken)
	if err != nil {
		return
	}
	defer userInfoResp.Body.Close()

	userInfo := resp.UserInfo{}
	contents, err := ioutil.ReadAll(userInfoResp.Body)
	if err == nil {
		err = json.Unmarshal([]byte(contents), &userInfo)
		if err == nil {
			baseLogin(userInfo, c)
		} else {
			fmt.Print("Unmarshal userinfo error")
		}
	}
}

func baseLogin(userinfo resp.UserInfo, c *gin.Context) {
	U := &model.SysUser{Username: userinfo.Email, Password: userinfo.Email}
	err, user := service.Login(U)
	if err != nil {
		user = &model.SysUser{Username: userinfo.Email, NickName: userinfo.UserName, Password: userinfo.Email, HeaderImg: userinfo.Picture, AuthorityId: constant.CommonAuthorityId}
		err, userReturn := service.Register(*user)
		if err != nil {
			response.FailWithDetailed(response.ERROR, resp.SysUserResponse{User: userReturn}, fmt.Sprintf("%v", err), c)
		}
		// now login again
		U2 := &model.SysUser{Username: userinfo.Email, Password: userinfo.Email}
		_, user = service.Login(U2)
	}

	tokenNext(c, *user)
}
在baseLogin方法中实现了登录、注册,如果是第一次登录,自动给用户注册,并登录,为了兼容gin-vue-admin的账号密码体系,账号和密码都使用了用户邮箱账号。(因此需要把原来的账号密码登录给屏蔽掉,否则有安全风险。当然你可以另外实现一个账号体系)
至此,后端需要改造的内容完成了,下面看前端如何改造。
前端实现
首先,把login.vue中的账号密码框去掉,只保留登录按钮。当点击登录时,发起登录请求。
一、发起登录请求
在store/module/user.js中添加新方法,Auth,向后端发起认证
        async Auth() {
            const res = await auth()
            // 兼容code非0时报错,使用unauth标识未登录
            if (res.code === 0 && res.msg === 'unauth') {
                const redirect = res.data
                if (redirect) {
										// 后端返回授权链接,则跳转过去
                    location.href = redirect
                }
            } else {
                router.push({path: '/layout/dashboard'})
            }
        }
在api/user.js中实现auth方法
// @Summary 用户登录Oauth
// @Produce  application/json
// @Router /base/auth [get]
export const auth = () => {
    return service({
        url: "/base/auth",
        method: 'get'
    })
}
二、获取授权后回跳地址中的code向后端发起callback,获取jwt
在google授权后,将会跳转回我们指定的页面,也就是googleOauthConfig.RedirectURL,此时需要获取都URL中的state和code,然后post给后端进行用户信息获取继而完成jwt的签发。
这里需要实现一个空白页面(核心),callback.vue
<template>
  <div>
  </div>
</template>
<script>
import {mapActions} from 'vuex'

export default {
  render: (createElement) => createElement('h5', "Redirecting..."),
  methods: {
    ...mapActions('user', ['CallBack']),
    async callbackLogin(data) {
      await this.CallBack(data)
    },
    obtainUrlParameter(param) {
      let url = window.location.search;
      var pairs = url.replace("?", "").split("&")
      for (let i = 0; i < pairs.length; i++) {
        let k_v = pairs[i].split("=")
        if (k_v[0] === param) {
          return decodeURI(k_v[1])
        }
      }
      return null
    }
  },
  mounted() {
    let state = this.obtainUrlParameter('state')
    let code = this.obtainUrlParameter('code')
    this.callbackLogin(
        {
          "state": state,
          "code": code
        }
    )
  }
}
</script>
同样的,在store/module/user.js中实现CallBack方法:
        async CallBack({commit}, info) {
            const res = await googleCallback(info)
            if (res.code == 0) {
                commit('setUserInfo', res.data.user)
                commit('setToken', res.data.token)
                const redirect = router.history.current.query.redirect
                if (redirect) {
                    router.push({path: redirect})
                } else {
                    location.href = '/livetech_platform/'
                }
            }
        },
在api/user.js中,实现googleCallback:
export const googleCallback = (data) => {
    return service({
        url: "/base/auth/callback",
        method: 'post',
        data: data
    })
}
要注意的是:前端回跳地址不能使用vue的hash模式,而是需要使用history模式(非锚点链接),否则google apis后台无法配置为授权的重定向URI!
效果
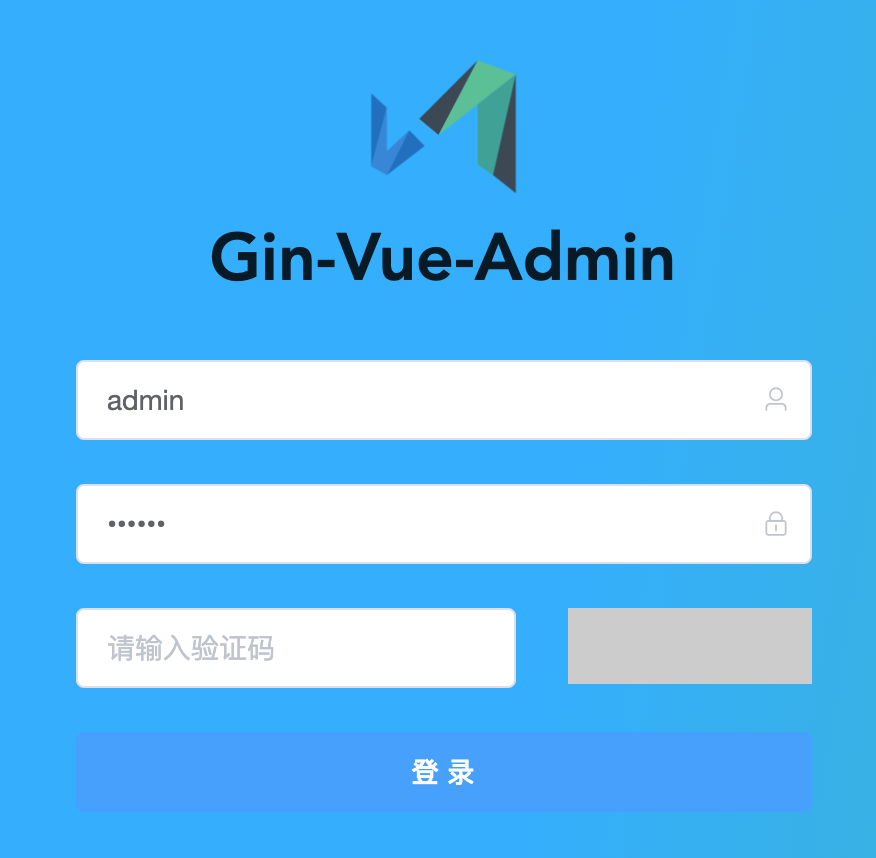
改造前登录页面
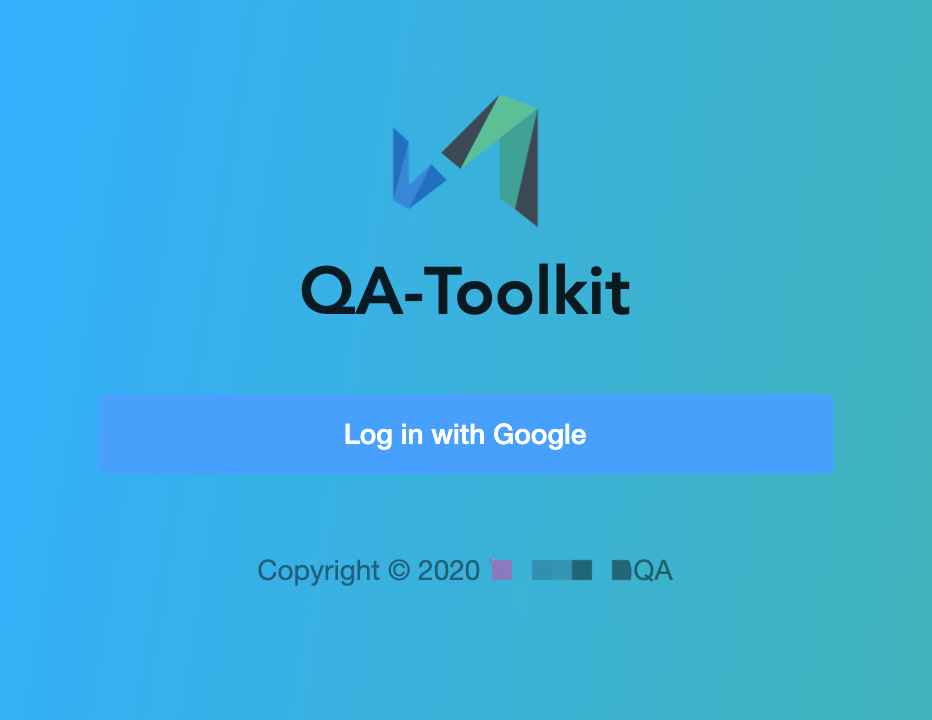
改造后登录页面
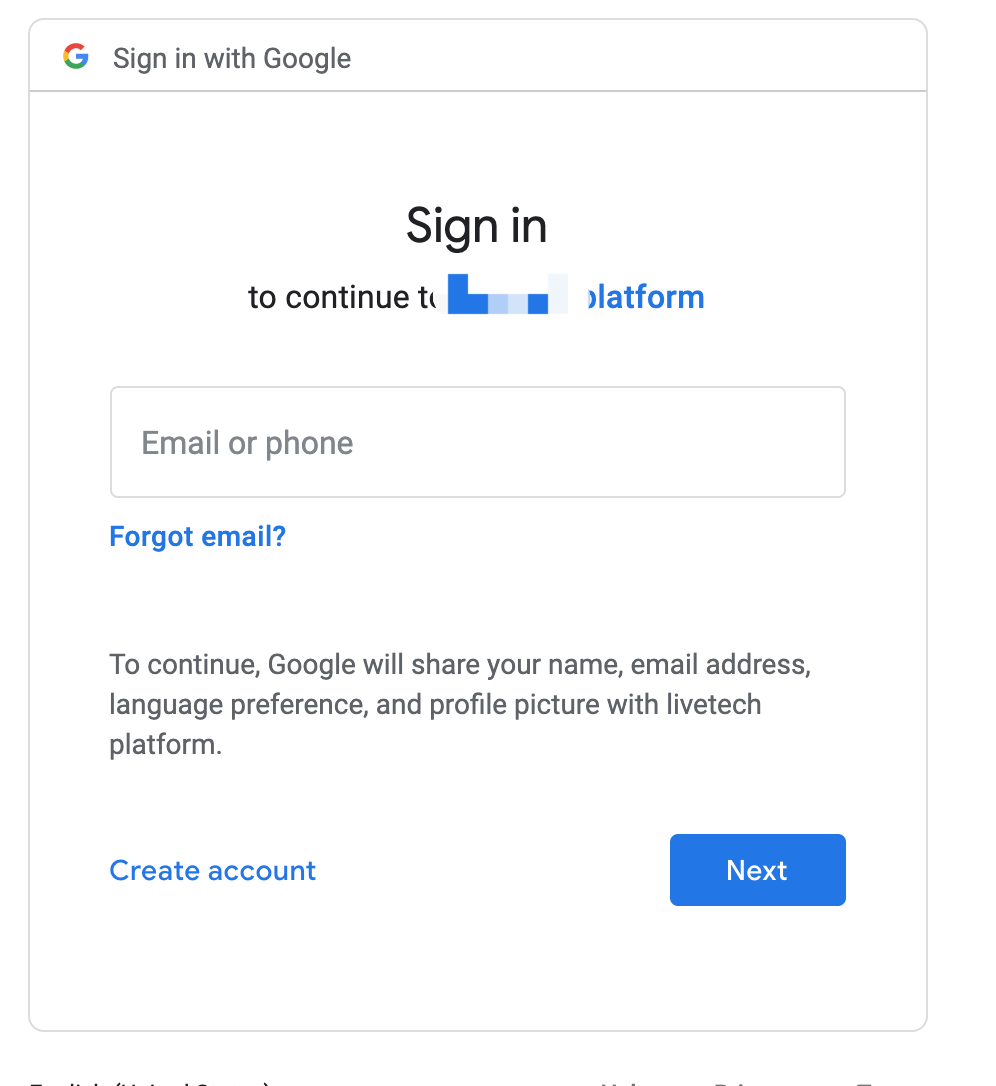
授权页面
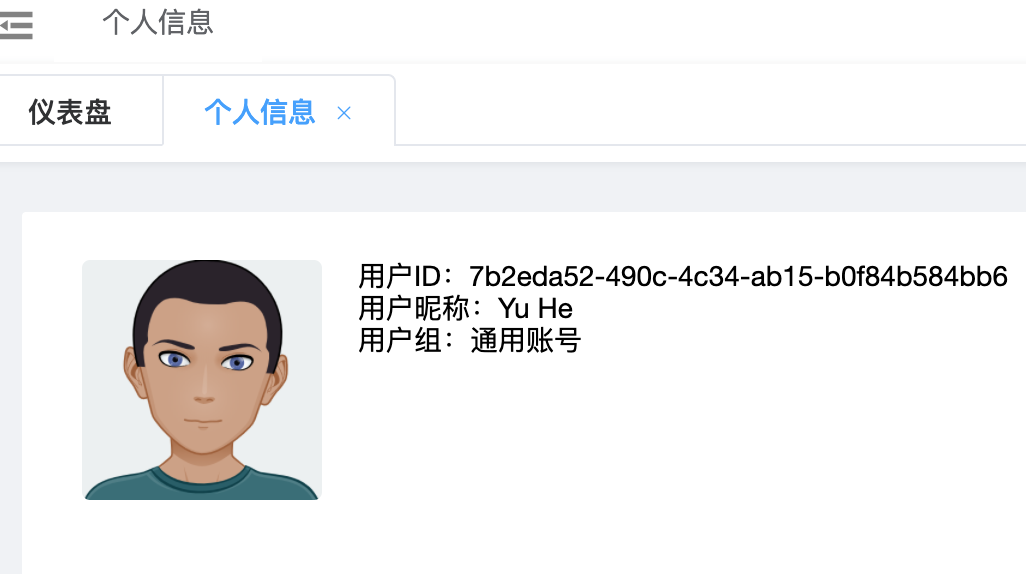
个人信息